What you need before you start
- A disposal sized for your household, usually half to one horsepower.
- A mounting kit, if one is not included, and plumber's putty.
- A dishwasher drain connection and a clamp, if a dishwasher shares the sink.
- A power cord kit, or a switched outlet under the sink.
- A bucket, a screwdriver set, pliers and a flashlight.
Check that your sink has a standard three-and-a-half inch drain opening. Most stainless sinks do, while some older sinks need an adapter.
The installation, step by step
- 1
Turn off the power
Switch off the breaker for the circuit, and test that the outlet or wires are dead before touching them.
- 2
Remove the old drain or disposal
Loosen the trap and the slip nuts, and lift out the old strainer and mounting ring if it has one.
- 3
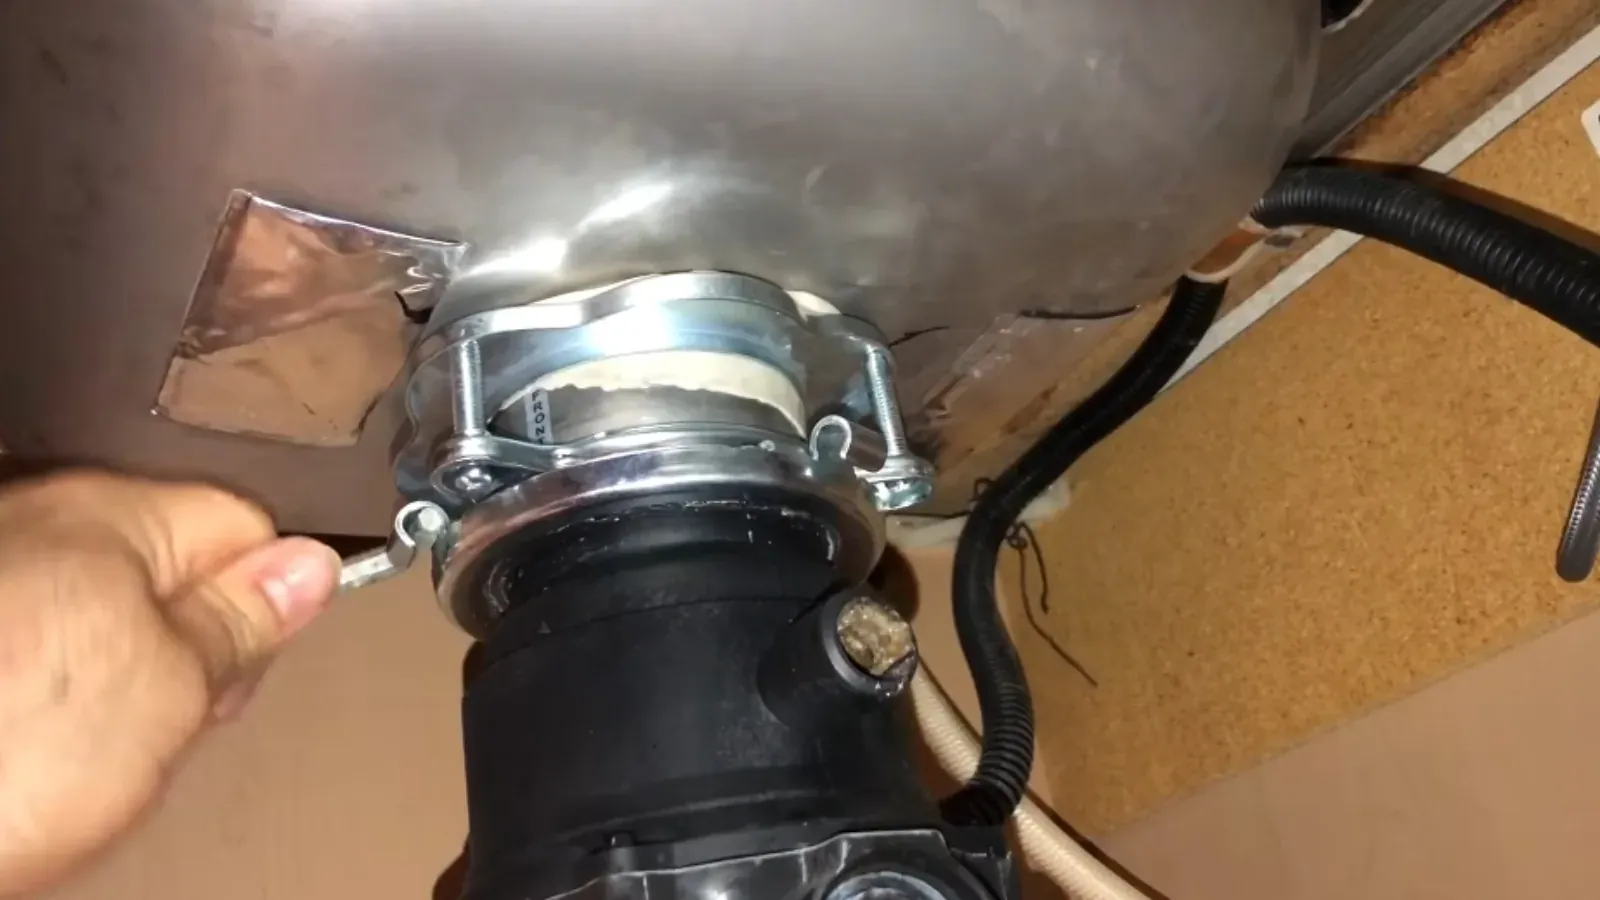
Mount the flange
Press a rope of plumber's putty under the sink flange and fasten it to the sink with the mounting ring.
- 4
Hang the disposal
Lift the unit onto the mount and turn it until it locks, then connect the discharge elbow.
- 5
Knock out the dishwasher plug
If a dishwasher connects, remove the knockout plug inside the disposal with a screwdriver and hammer. Retrieve it afterward.
- 6
Reconnect drain and test
Reattach the trap, connect power, and run water to check for leaks before using the unit.
Where do-it-yourself installs go wrong
Two mistakes cause most callbacks. The first is forgetting to knock out the dishwasher plug, which leaves the dishwasher unable to drain. The second is a poorly seated flange, which leaks a slow drip into the cabinet and rots the base before anyone notices.
The wiring is the other risk. A hardwired disposal needs a proper connection inside a junction box, and in many jurisdictions electrical work is for a licensed electrician. If the cabinet has no outlet, ask us, and we coordinate the electrical part.
Bridgeton kitchens and the older drain
Bridgeton's Historic District covers about a quarter of the city and includes more than 2,000 properties, and the National Register listing dates to 1982. We do not assume what any house has. Where a kitchen drain is narrow or runs a long way horizontally, a disposal sends more solids into that line than it was built to carry. A disposal connection follows the plumbing subcode (N.J.A.C.
5:23-3.15), and any hardwiring follows the National Electrical Code (NEC).
That is why we look at the drain before we sell anyone a bigger unit. If your kitchen line slows down even with a disposal you rarely use, a camera or a cleaning visit may help more than a more powerful motor. For installation permits, ask the Bridgeton construction office whether a disposal swap needs one in your case, since permit rules vary.
Homeowners in Upper Deerfield Township and Vineland should add one question: is the house on municipal sewer or a septic system, since that decides whether a disposal is a good idea at all.
Disposal types compared
| Type | How it runs | Good for |
|---|---|---|
| Continuous feed | Wall switch turns it on, you feed food while it runs | Most households, easy to use |
| Batch feed | Runs only when the stopper is turned in place | Homes with small children, extra safety |
| Higher horsepower | More grinding power and sound insulation | Heavy use, large households |
A basic half-horsepower continuous feed unit suits a small household. If you cook a lot and have a larger family, a stronger unit grinds more reliably and lasts longer.
What affects the cost of installing a disposal
- The unit. Price depends on horsepower, features and brand.
- Electrical work. An outlet or switch under the sink adds cost.
- Drain condition. An old or clogged drain line may need cleaning first, covered under drain cleaning.
- Sink type. Granite, composite and some stainless sinks need extra care.
- Removal of the old unit. Disposal and cleanup are part of the labor.
We give you a clear price before work starts, and we do not quote a number from a blog. Call (856) 250-1784 with your sink type and the model you want.
Choosing between a DIY install and a plumber
A disposal swap on an existing, working setup is a fair DIY project if you are comfortable with a wrench and a screwdriver. The risk grows with each change: a new electrical connection, a different sink, a dishwasher hookup or an old corroded flange all raise the odds of a leak or a shock.
A plumber also checks what you cannot see from above the counter. We look at the trap, the drain slope and the shutoff valves while the cabinet is open, which prevents the callback that comes from a good disposal on a bad drain.
Noise, sound insulation and what to expect on day one
A new disposal hums and grinds, and the better models are noticeably quieter because of insulation around the motor. After installation, run water and grind a few ice cubes to seat the parts. A slight vibration at first is normal, and a rattle means something is loose.
Check under the sink for a week. A drip that appears only when the unit runs points to the flange or the discharge connection. Catching it early avoids a stained cabinet floor.
What not to put in once it is installed
A disposal handles soft scraps in small amounts. Grease, fibrous vegetables, coffee grounds in quantity, pasta and rice do not belong in it, even though many people put them there. The result is a slow drain that looks like a plumbing failure but is really a habit problem.
Run cold water while grinding and for fifteen seconds afterward. If you rent a house served by a septic system, check with your septic contractor before installing a disposal, since heavy use can load the tank.
Questions about this topic in Bridgeton
A like-for-like swap is generally maintenance, but adding electrical or changing piping may require a permit. Ask the Bridgeton construction office before you start.
A straightforward swap is usually a short visit. A first-time install with new electrical takes longer.
Often yes, if the drain and power are suitable. The older drain line is the main concern, so we check it first.
Clear the drain first. A disposal sends solids into the same pipe and makes a partial clog worse.
Many septic owners avoid heavy disposal use. Ask your septic contractor, and consider the size of the household.
A confident DIYer can swap a disposal. A first-time install with wiring and drain changes is safer with a plumber and electrician.
Need a disposal installed?
Call for a clear price and a booking in Bridgeton.